Ellis-Rhodes Thumper

History:
James Ellis, RPT felt the blow delivered by the old thumper design was potentially damaging to exam pianos. The old thumper’s small weight and tall drop height delivered an excessively high-speed blow to the key. Jim decided a larger weight and shorter drop height would provide a better match to the action design. John Rhodes took Jim’s concepts and designed the present thumper. The new design delivers the same energy to the hammer as the old thumper, but without the punishing shock loads.
About accuracy:
The thumper has been fabricated with great care. The brass rod's weight is accurate to 0.07 ounce. The bushing cloth lining the guides is from Bill Spurlock. The critical mechanical dimensions have been held to +/- 0.3mm – a very close tolerance for wood. Please realize that many factors affect the test blow delivered to the string by the hammer. Careful construction and correct usage of the thumper can control only some of those factors. Others factors include: action design, action condition (wear, friction), regulating specifications (letoff, dip, blow, aftertouch, sharp key height, checking clearance), and hammer voicing. Remember that the original purpose of the thumper was to remove as much of the examiner’s personal variations as possible. This new thumper accomplishes that objective very well; but we are still stuck with all the other factors!
Care:
The thumper is fabricated from solid-core Baltic Birch, and sealed with lacquer. All glue joints are made with hot hide glue. The high-quality key bushing cloth is also held with hot hide glue. The contact pads of leather and felt are adhered to the brass rod and to each other with the highest quality blond shellac. With care, the thumper will last several lifetimes. It will probably survive drops to a carpeted floor without any ill effects; but if the parts do separate, please reassemble with the same care and adhesives used to build the thumper.
Storage:
Keep the thumper in its shipping carton. When wrapped with the packing material, it should survive considerable abuse. Remember that the felt can be attacked by moths.
Use for naturals:
The thumper is placed on the naturals with the cage edge flush with the key front. The cage is depressed solidly – taking the two supporting naturals to the bottom of their dip. Ensure that the felt & leather pads are centered side-to-side on the target key. The rod is drawn upward while being rotated so the pin contacts the bottom of the stop block. The rod is released, delivering the test blow.
Use for sharps:
The thumper is placed on the naturals which straddle the target sharp, with the cage edge flush with the sharp key front. The cage is depressed solidly – taking the two supporting naturals to the bottom of their dip. Ensure that the felt & leather pads are centered on the target key. The rod is drawn upward while being rotated so the pin contacts the top of the cage, missing the stop block. The rod is released, delivering the test blow.

John Rhodes, RPT.
Vancouver, WA


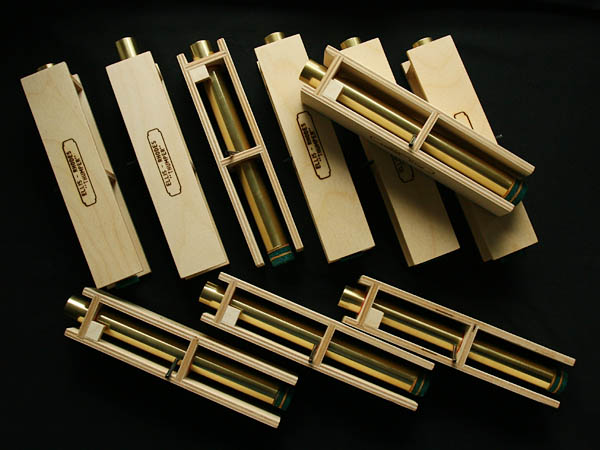
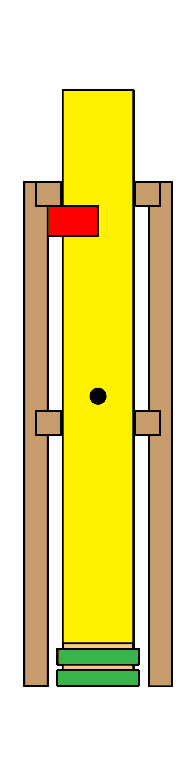
Here's a sketch which illustrates how the thumper works.

When the yellow brass rod is in its down position (roll pin resting on lower guide), about an inch of rod protrudes above the upper guide -- sufficient for a finger grip.

The roll pin (black dot) limits rod travel when the rod is drawn up for a test blow.

The red rectangle is a stop block which stops the roll pin when the rod is drawn up for naturals. For sharps, the rod is rotated so that the roll pin misses the block -- and stops against the upper guide.


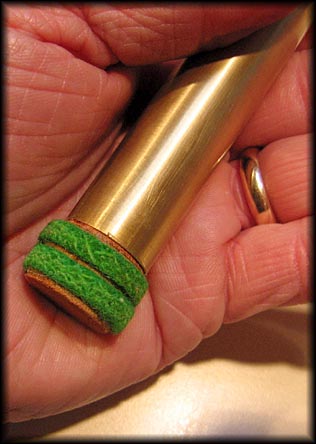
Double pad: medium-firm leather with Steinway punchings. The double-pad delivers a dead blow (no rebound).


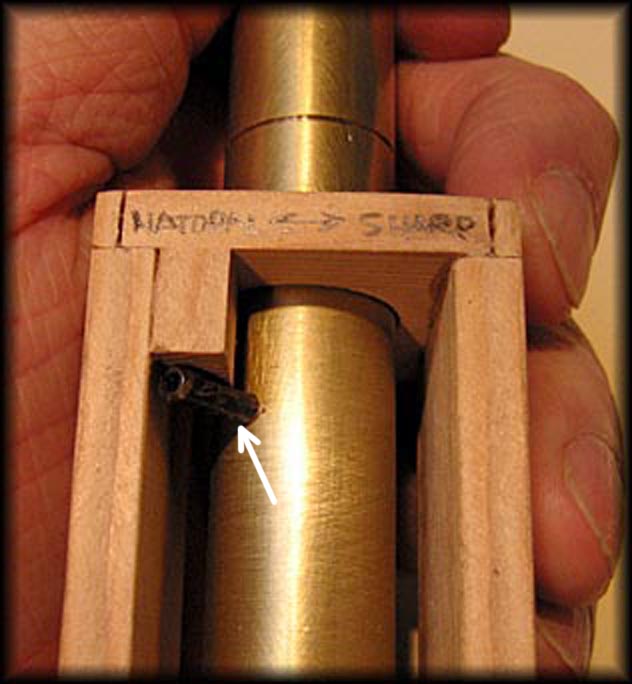
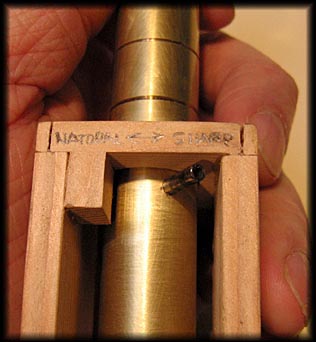
Notice the roll-pin (arrow) is under the stop block in the left picture, while in the right picture the rod has been rotated so that the roll pin misses the stop block.

The two rotation positions of the rod determine whether the test-blow will be for a natural, or for a sharp.

[Ignore the scribed rings in the rod -- this is a prototype which was used to try many ideas!]


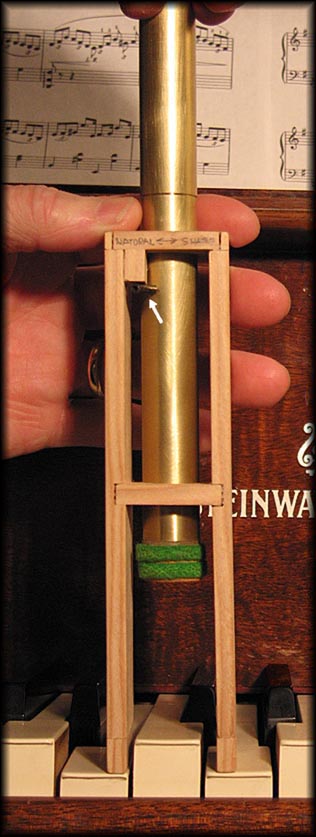
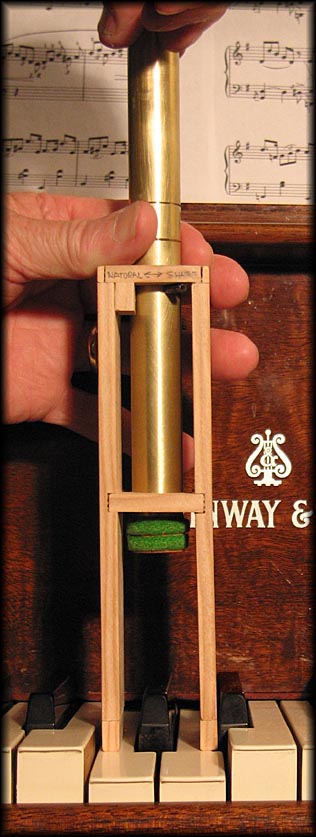
THUMPER POSITIONED FOR A NATURAL

left picture: The cage centers the rod by straddling the key. Pressing down on the cage establishes the reference height for the test blow on the natural.

Note that the roll pin (arrow) is rotated so that it stops underneath the stop block; this sets the correct test-blow distance for the natural.

right picture: A 2-inch drop delivers a substantial blow.


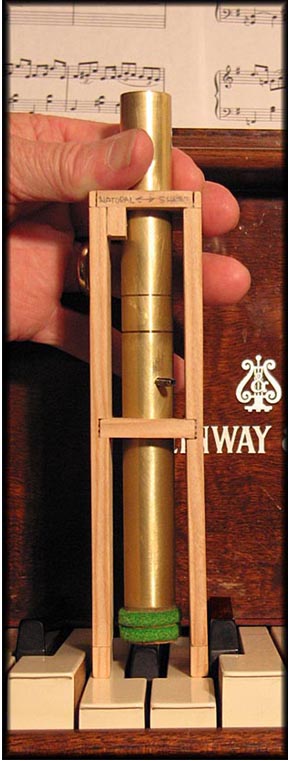
THUMPER POSITIONED FOR A SHARP

left picture: The cage fits nicely between the keys as shown, and when the naturals are depressed, establishes the reference height for the test blow on the sharp.

The pin is rotated so that it passes the stop block and stops underneath the guide; this sets the correct test-blow distance for the sharp.

right picture: Sharp test blow completed.